


Available Now
How to Prep a House for Painting Interior
Leo Donovan • Sep 28, 2023
Preparing Your Home for Interior Painting: A Comprehensive Guide
To get your house ready for interior painting, start by removing furniture, clean the walls, fix any holes, and sand them smooth. Cover stains with a special primer before painting.
Thorough preparation is crucial for a successful interior painting project, ensuring paint adhesion, even coverage, and long-lasting results.- Rushing or skipping the preparation phase can lead to costly issues like peeling paint and uneven surfaces, making thorough preparation essential.
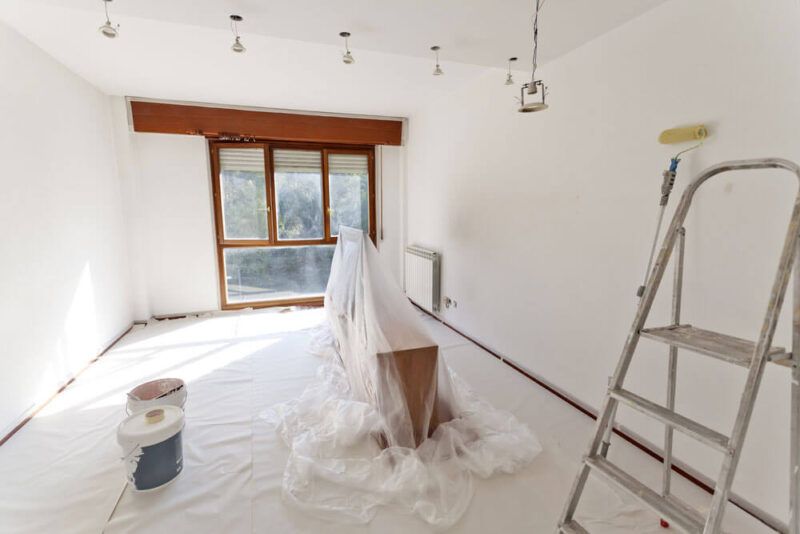
- Before painting, remove breakable items, curtains, blinds, rugs, and obstructions to protect your belongings and facilitate the painting process.
- Wall preparation involves cleaning, dealing with debris, and repairing damaged areas, followed by sanding for a smooth surface.
- Consider undercoating, especially when painting over previously painted walls, as it enhances color consistency, reduces imperfections, provides moisture protection, and enhances durability.
Painting the interior of your home can be a rewarding DIY project, but the key to achieving a professional finish lies in thorough preparation. Whether you're a beginner or have some experience with painting, this comprehensive guide will walk you through each step, ensuring your painting project is hassle-free and delivers stunning results.
Introduction
Importance of Preparing a House for Interior Painting
Painting the interior of your house isn't just about picking your favorite color and rolling it onto the walls. Proper preparation is the foundation of a successful painting project. It ensures that your paint adheres well, covers evenly, and lasts for years without issues.

Saving Time, Hassle, and Money with Proper Preparation
Some might be tempted to skip or rush through the preparation phase, but this often leads to problems later on. Proper preparation can save you time and money in the long run by avoiding issues like peeling paint, uneven surfaces, or the need for costly touch-ups.
Removing Items and Wall Hangings
Clearing Breakable Items
Before you start, it's essential to remove breakable items from the room. These include vases, fragile decorations, or anything that could accidentally get bumped during the painting process.
Taking Down Curtains, Blinds, Rugs, and Throws
Next, remove curtains, blinds, rugs, and throws. This step not only protects your furnishings but also provides easier access to your walls.
Considering Access and Obstructions
Consider the room's layout and any potential obstructions. Move furniture to the center of the room, so it's out of your way. This will give you ample space to work and prevent accidental paint spills on your valuable belongings.
Wall Preparation

Cleaning the Surface
Start by cleaning the walls. Dust and dirt can affect paint adhesion, so use a mild detergent and water solution to clean the surface. A sponge or soft cloth is ideal for this task. Rinse with clean water and allow the walls to dry completely.
Dealing with Dry Debris
Inspect the walls for dry debris like cobwebs or loose particles. Remove them with a duster or a dry cloth.
Repairing Damaged Walls
If your walls have any holes, cracks, or dings, now is the time to repair them. Use spackling paste or putty to fill these imperfections. Once dry, sand the patched areas until they are smooth.
Sanding
Sanding is crucial for achieving a smooth and even surface. Start with medium-grit sandpaper to remove any rough spots or imperfections. Follow up with fine-grit sandpaper for a flawless finish. Remember to wear a dust mask while sanding to protect your lungs.
Inspecting for Spots and Stains
Examine the walls closely for spots and stains. These might be oil or grease marks, water stains, or crayon marks. Use a stain-blocking primer to cover these areas before painting.
Proper Drying and Clean-Up
Allow the patched areas, primer, and any cleaning solutions to dry completely before moving on. Clean your tools and dispose of any used materials properly.
Cleaning the Room
Methods for Cleaning Walls
Different wall surfaces may require various cleaning methods. For painted walls, mild detergent and water work well. For unpainted drywall, be gentle to avoid damaging the surface.
Removing Grease and Oil Stains
For stubborn grease or oil stains, a mixture of baking soda and water can help. Apply it to the stains, gently scrub, and rinse with clean water.
Vacating the House and Removing Kids and Pets
Ensuring Safety During Painting
Paints and fumes can be harmful, especially to children and pets. Ensure proper ventilation during painting by opening windows and doors. If possible, use low-VOC (volatile organic compounds) or VOC-free paints for improved indoor air quality.
Temporary Relocation of Family and Pets
Consider temporarily relocating your family and pets during the painting process. This minimizes their exposure to fumes and helps maintain a safe environment.
Other Considerations for Interior Painting Prep
Recommended Tools and Supplies
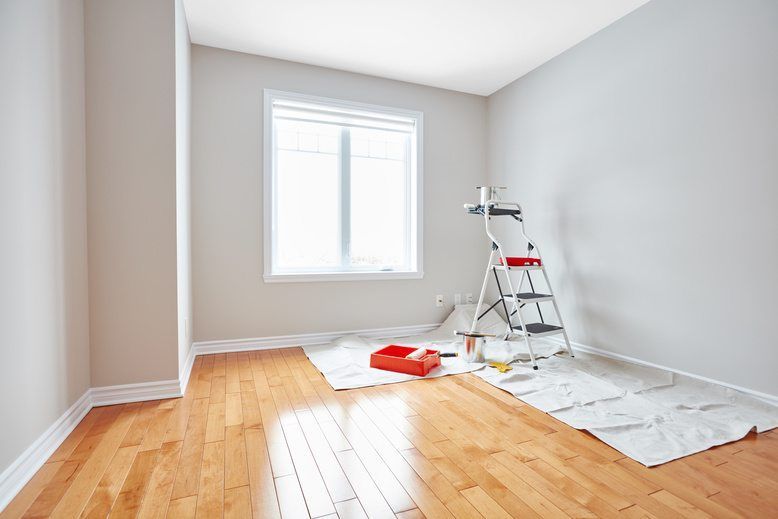
Gather the necessary tools and supplies, including paintbrushes, rollers, painter's tape, drop cloths, spackling paste, sandpaper, primer, and, of course, your chosen paint colors. Quality tools make a noticeable difference in the final result.
Undercoating for Previously Painted Walls
If you're painting over previously painted walls, consider using an undercoat or primer to ensure proper adhesion and uniform color. It's particularly crucial when changing from a dark to a light color.
Enhanced Color Consistency
One surprising fact about undercoating for previously painted walls is that it can significantly enhance color consistency, especially when transitioning from a dark color to a light one. Undercoating acts as a barrier, preventing the old color from showing through the new paint, resulting in a more even and uniform finish.
Reducing Surface Imperfections
Undercoating can help conceal minor surface imperfections on previously painted walls. It acts as a filler, smoothing out small dents, cracks, or uneven textures, ultimately leading to a flawless final paint job.
Protection Against Moisture
Undercoating not only promotes paint adhesion but also offers an additional layer of protection against moisture. This can be particularly valuable in areas prone to humidity, preventing the paint from blistering or peeling due to damp conditions.
Enhanced Durability
Undercoating contributes to the durability of your paint job. It reinforces the surface, making it more resistant to wear and tear over time. This is especially beneficial in high-traffic areas or spaces that require frequent cleaning.
Reviving Older Walls
Undercoating is an excellent choice for rejuvenating older walls. It provides a fresh start, allowing you to apply a new paint color on top of the existing one without the need for extensive sanding or removal. This can save time and effort in renovation projects.
Expert Tips from Paint Professionals
Insights from Professional Painters
Professional painters emphasize the importance of preparation. They recommend taking your time with each step, as rushing can lead to costly mistakes later on. Careful preparation ensures a smoother painting process.
The Right Way to Prep a House for Painting
While it might be tempting to cut corners, the right way to prep a house for painting is the thorough way. Don't skip cleaning, repairing, or priming—each step contributes to a successful outcome.
Video Resources for Interior Painting Preparation
YouTube Video Tutorials
If you're a visual learner, numerous YouTube tutorials provide step-by-step guidance on preparing your home for interior painting. Watching experts in action can help you better understand the process.
Conclusion
Recap of Key Steps in Preparing a House for Interior Painting
To recap, preparing your home for interior painting involves several essential steps:
- Remove breakable items and wall hangings.
- Consider access and obstructions.
- Clean the walls thoroughly.
- Repair any damaged walls and sand for a smooth finish.
- Inspect for spots and stains, and use a stain-blocking primer.
- Clean the room and remove grease or oil stains.
- Ensure safety by proper ventilation.
- Temporarily relocate family and pets.
- Gather recommended tools and supplies.
- Consider undercoating for previously painted walls.
Achieving a Successful DIY Painting Project
By following these steps and considering expert insights, you can achieve a successful DIY painting project that not only enhances the aesthetics of your home but also ensures the longevity of your paint job.
Additional Resources and References
In our quest to transform your interior space, we've gathered valuable resources and references to guide you through the journey of preparing your house for interior painting. Explore these trusted sources for expert insights and helpful tips.
https://www.barker-whittle.com.au/blog/what-are-the-benefits-of-interior-painting
https://www.dulux.com.au/how-to/general/how-to-care-for-dulux-paint/
https://diy.stackexchange.com/questions/1380/how-do-i-prepare-an-already-painted-wall-for-new-paint
FAQs
Q1: Do you need to prep interior walls before painting?
Yes, proper preparation of interior walls is essential for a successful paint job. This includes cleaning, repairing, and priming the surface.
Q2: How do professional painters prep walls?
Professional painters emphasize thorough preparation, including cleaning, repairing, and priming. They also take their time with each step to ensure a smooth finish.
Q3: What should not be done before painting interior walls?
Avoid rushing through the preparation phase. Skipping cleaning, repairing, or priming can lead to issues like peeling paint or an uneven surface.
Q4: How to prep a house for painting interior Australia?
The process of preparing a house for interior painting in Australia is similar to the steps outlined in this guide. It involves cleaning, repairing, and priming walls to ensure a successful painting project.
Q5: Do you need to undercoat already painted walls?
If you're painting over previously painted walls, using an undercoat or primer is advisable. It improves adhesion and color uniformity, especially when changing from a dark to a light color.
GET IN TOUCH
Need more information? Speak to one of our experts and get personalised advice on your project to bring your vision to life. Contact us today to schedule your consultation or request a free consultation.
Contact Us

Unveiling artistic wonders, "Innovative Painting Techniques for Concrete Surfaces" explores creative methods like stenciling, acid staining, and glow-in-the-dark paint. Discover how these techniques transform dull concrete into vibrant canvases, making art accessible and exciting for everyone.Diverse Techniques, Endless Possibilities: Explore decorative stenciling, acid staining, glow-in-the-dark paint, and metallic epoxy coatings for a varied and dynamic range of artistic expression. · Practical Applications Beyond Aesthetics: Innovative painting techniques aren't just about looks. They enhance safety, functionality, and durability in various settings. · Maintenance Matters: Preserve the beauty of painted concrete with regular cleaning, proper sealants, and prompt repairs, ensuring longevity and vibrancy. · DIY vs. Professional Services: Consider factors like budget, time commitment, and complexity when deciding between a DIY project and hiring professionals for concrete painting endeavors. · Concrete as a Canvas: Celebrate the transformation of concrete into a legitimate medium for art. Discover how visionary artists and designers are reshaping public spaces with concrete masterpieces. Introduction The world of artistic expression has found a new canvas – concrete surfaces. In recent times, the popularity of innovative painting techniques for concrete has soared, transforming once mundane structures into captivating works of art. As someone deeply immersed in the world of creative exploration, I am thrilled to take you on a journey through the transformative power of painting on concrete. For further inspiration and professional insights, explore the offerings of https://townsvilleconcretingcompany.com.au/ .

Discover the wonders of eco-friendly paints and concrete for home projects. They improve air quality, save money in the long run, offer vibrant colors, empower DIY adventures, and bring real-world benefits like reduced allergies and energy efficiency. · Improved Indoor Air Quality: Opting for eco-friendly paints reduces volatile organic compounds (VOCs), promoting healthier indoor air and minimizing respiratory issues. · Cost-Effective Sustainability: Despite initial costs, eco-friendly paints and concrete offer long-term savings through durability and energy-efficient properties. · Diverse Aesthetic Choices: Contrary to misconceptions, eco-friendly paints boast vibrant, long-lasting colors, ensuring aesthetic satisfaction without compromising sustainability. · DIY Opportunities: Embrace sustainable home improvement with DIY projects using eco-friendly paints and concrete, contributing to both personal satisfaction and environmental well-being. · Real-World Impact: Explore success stories where families experienced tangible benefits, from reduced allergies to lower energy bills, showcasing the real-world positive impact of eco-friendly choices.

To estimate the cost of painting a house's outside, measure the area, pick the right paint, factor in labor, and account for any extra work needed. Consider hiring pros for quality. · Accurate cost estimation for exterior house painting is crucial for effective budgeting and project planning. · Factors such as surface area, type, prep work, paint quality, labor, and additional features significantly impact the overall cost . · Cost ranges vary widely, with small to medium-sized homes averaging $2,000 to $5,000. · Utilize online calculators, painting software, and industry guides for precise cost estimation. · While DIY painting can save money , professional painters offer expertise , efficiency, and guaranteed quality. When it comes to transforming the look of your home, few things have the impact of a fresh coat of paint. Whether you're planning to give your house a facelift or you're getting it ready to sell, estimating the cost of exterior house painting accurately is of utmost importance. It helps you budget effectively, avoid unexpected expenses, and ensures that your project proceeds smoothly. In this guide, we will dive deep into the world of exterior house painting cost estimation. We will explore the various factors that can influence the cost, provide you with average cost ranges, and take you through a step-by-step process to estimate the expenses involved. Additionally, we will share valuable resources, tips for cost-saving, and insights into the advantages of hiring professional painters. So, let's get started on your journey to understanding the art of estimating exterior house painting costs.
GET IN TOUCH
Need more information? Speak to one of our experts and get personalised advice on your project to bring your vision to life. Whether you're considering a fresh coat of paint or specialized concrete installations, our team is here to help. For expert concrete services, check out our trusted partners at Concrete Contractors. Contact us today to schedule your consultation or request a free quote
Contact Us
Painters Ballarat, VIC
Professional Local House Painters Near Me
Perfect Painters in Ballarat are professional and local Ballarat painters. We've been operating for over 10 years with the best painters in the area.
Our team is only made up of the most highly qualified and skilled painters to ensure you always get the results you're looking for.
Need a new coat of paint? Reach us at (03) 4828 1320. Our Ballarat Painters are ready for you!
Quick & Reliable
We can be contacted anytime via email or telephone
Location
131 Scott Parade, Ballarat East VIC 3350
info@perfectpaintersinballarat.com.au
Call
Ballarat's #1 professional House painting Service providers since 2010.
This is a referral website, please visit our Privacy Policy for more information. Find us online.
Navigation
Services
Working hours
- Mon - Fri
- -
- Sat - Sun
- Closed
Give us a call and if we cannot get to you straight away, one of our specialist will call you back shortly.
New Paragraph